Introduction
This is very brief and basic list of steps to follow if you want to write a shellcode under Linux operating system.
1. Craft the shellcode
The first step and by far the most important one is to find a vulnerability and to write the shellcode that’s exploiting the vulnerability. In this tutorial we will write a dummy shellcode represented by the “Hello World” program. The easiest way to write a shellcode is first to write it in the C language and then in order to have a more compact version, to translate it or to rewrite the shellcode in assembler.
1.1 Craft the shellcode in C
The main goal of writing the shellode in C is to have first working version of the exploit without (yet) bothering about the constraints of the shellcode execution (see later the chapter about the validity of the shelcode). In our case, the C version of our dummy shellcode is the following one:
#include<stdio.h>
int main(){
    write(1,"Hello World \n", 14);
    return 0;
}
After the compilation (gcc -o hello hello.c) we can take a look at the generated assembly code (objdump -d ./hello -M intel) and we would see that for a very small C program the assembly version is quite long (this is mainly due to the C preprocessor); it’s 228 lines length ( objdump -d ./hello -M intel | wc -l).
Now, we would like to “translate” the C version of our shellcode in the assembly version and the most straightforward way is by finding the system calls that hat are made by the C version of the shellcode. In some cases the system calls are quite obvious (the case of the write function) but sometimes it’s not so easy to guess. The tool that will give to you the system calls is the strace. In our case the strace ./hello will have the following output (the parts that are interesting for us are in bold):
execve("./hello", ["./hello"], [/* 62 vars */]) = 0
brk(0)                                  = 0x8826000
access("/etc/ld.so.nohwcap", F_OK)      = -1 ENOENT (No such file or directory)
mmap2(NULL, 8192, PROT_READ|PROT_WRITE, MAP_PRIVATE|MAP_ANONYMOUS, -1, 0) = 0xb76fa000
....
....
mprotect(0xb771d000, 4096, PROT_READ)   = 0
munmap(0xb76dd000, 117407)              = 0
write(1, "Hello World \n\0", 14Hello World
)        = 14
exit_group(0)                           = ?
1.2 Craft the shellcode in assembler
Now that we have the system calls it is possible to get some infos like the parameters needed by the each system call (using man) and the system calls numbers (all the system calls names and number are in /usr/include/i386-linux-gnu/asm/unistd_32.h file).
So, the number of the write call is 4 (using cat /usr/include/i386-linux-gnu/asm/unistd_32.h | grep write) and the parameters are the following one (using man 2 write):
ssize_t write(int fd, const void *buf, size_t count);
For the exit system call the number is 1 and the call parameter are :
void _exit(int status);
Having all the needed information, we can write the assembler version of our dummy shellcode.
In order to call system calls in assembler, you must fill the tax register with the system call number and fill the register ebx, ecx, edx for every parameter that the system call need.
For example the write have 3 parameters so the tax register will be filled with 0x4 (the system call number), ebx register will contain the file descriptor (1 for sysout), ecx register will contains the address of the string to print, and edx register will contain the length of the string to print (if you don’t have any knowledge of linux assembler you can take a look to this very good introduction Assembly Language and Shellcoding on Linux ):
global _start
section .text
_start:
    ;execute write(1,"Hello World \n", 14);
    mov eax, 0x4
    mov ebx, 0x1
    mov ecx, message
    mov edx, 0xD
    int 0x80

    ;execute _exit(0);
    mov eax, 0x1
    mov ebx, 0x5
    int 0x80
section .data
    message: db "Hello World!", 0xA
Now, we can create an executable (using nasm and ld) using the following commands:
nasm -f elf32 -o hello.o hello.asm
ld -o hello hello.o
2. Test your shellcode
In order to test your shellcode you can use the following C program (which is a slightly modified version of the code from the (famous) “Smashing the stack for fun and profit“):
#include<stdio.h>
#include<string.h>
unsigned char shellcode[] = \
"replace this with the hex version of the shellcode";
main()
{
    printf("Shellcode Length:  %d\n", strlen(shelcode));
    int (*ret)() = (int(*)())shellcode;
    ret();
}
The above lines are simulating a vulnerable program by overwriting the return address of the main() function with the address of the shellcode, in order to execute the shellcode instructions upon exit from main().
The HEX version of the shellcode can be obtained from the binary file using the objdump utility and a much smarter version of the command can be found on commandlinefu.com
Lets compute the HEX version of our dummy shellcode and then test it with our test program.
The HEX version of our assembler version of the dummy shellcode is the following one:
"\xb8\x04\x00\x00\x00\xbb\x01\x00\x00\x00\xb9\xa4\x90\x04\x08
\xba\x0d\x00\x00\x00\xcd\x80\xb8\x01\x00\x00\x00\xbb\x05\x00\x00\x00\xcd\x80"
We add the new shelcode to the test program and then compile the test program:
gcc -z execstack shellcode.c -o shellcode
We execute the shelcode program and we have the following output:
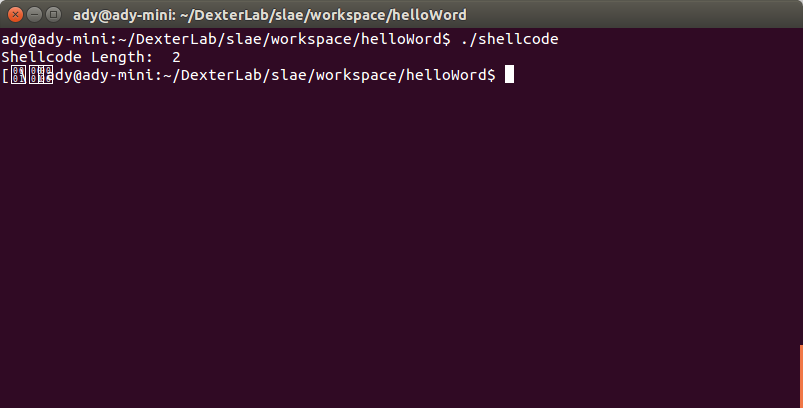
As you can see the execution didn’t went very well for a number of reasons that will be explained in the second part of this small tutorial.

You must be logged in to post a comment.