Introduction to Linux shellcode writing (Part 2)

3.  Recap

In the previous ticket we created a dummy shellcode firstly in C language and then in the assembler language; we tested the dummy shellcode but we’ve seen that the  execution was failing. In this ticket we will try to fix the dummy shellcode problems and hopefully we will be able to execute it successfully.

The 2 most common pitfalls that the shellcode writers must address in their code are: the null bytes problem and the addressing problem.

4.The null bytes problem

Very often the shellcode is injected in the vulnerable program using ( C )string functions like strcpy, read, so the shellcode content will be treated as an array of char values terminated by a special NULL character (value ‘\0), so when the shellcode contains a NULL byte, the byte will be interpreted as a string terminator and the execution will stop. 

In order to fix the problem, you should not use the NULL byte in the shellcode, but firstly you have to find it. The easiest way to sport it is to use the objdump tool.

The output of objdump -d hello -M intel command is the following one:

hello:     file format elf32-i386
Disassembly of section .text:
08048080 <_start>:
 8048080:    b8 04 00 00 00           mov    eax,0x4
 8048085:    bb 01 00 00 00           mov    ebx,0x1
 804808a:    b9 a4 90 04 08           mov    ecx,0x80490a4
 804808f:    ba 0d 00 00 00           mov    edx,0xd
 8048094:    cd 80                    int    0x80
 8048096:    b8 01 00 00 00           mov    eax,0x1
 804809b:    bb 05 00 00 00           mov    ebx,0x5
 80480a0:    cd 80                    int    0x80

The hello is the binary containing the original shellcode, and in marked in bold the null bytes presented in the file.

The easiest way to fix the null byte problem is to xor the register/s and to fill the smallest register with the desired value. For example the :

mov    eax,0x4

will be replaced by:

;the eax will be full of zeroes
xor eax,eax
;add 4 to the al register not to eax
mov al,0x4

After changing all the faulty instructions the new hello word dummy shellcode will have the following structure:

global _start
section .text
_start:
    ;execute write(1,"Hello World \n", 14);
    xor eax, eax
    mov al, 0x4
    xor ebx, ebx
    mov bl, 0x1
    mov ecx, message
    xor edx, edx
    mov dl, 0xD
    int 0x80
    
    ;execute _exit(0);
    xor eax, eax
    mov al, 0x1
    xor ebx, ebx
    mov bl, 0x5
    int 0x80
section .data
    message: db "Hello World!", 0xA

We could check again to see if there are any NULL bytes in the new file. As you can see there are no NULL bytes anymore:

helloNoNull:     file format elf32-i386
Disassembly of section .text:
08048080 <_start>:
 8048080:    31 c0                    xor    eax,eax
 8048082:    b0 04                    mov    al,0x4
 8048084:    31 db                    xor    ebx,ebx
 8048086:    b3 01                    mov    bl,0x1
 8048088:    b9 a0 90 04 08           mov    ecx,0x80490a0
 804808d:    31 d2                    xor    edx,edx
 804808f:    b2 0d                    mov    dl,0xd
 8048091:    cd 80                    int    0x80
 8048093:    31 c0                    xor    eax,eax
 8048095:    b0 01                    mov    al,0x1
 8048097:    31 db                    xor    ebx,ebx
 8048099:    b3 05                    mov    bl,0x5
 804809b:    cd 80                    int    0x80

 5 The addressing problem

The addressing problem is linked to the datas that are used by the shellcode; in our case it is the string “Hello World !”. As you can see in the assembler code, the bx register will contain the memory address of the message to write on the screen:

mov ecx, message

and will be transformed by the compiler in the following instruction:

mov    ecx,0x80490a0

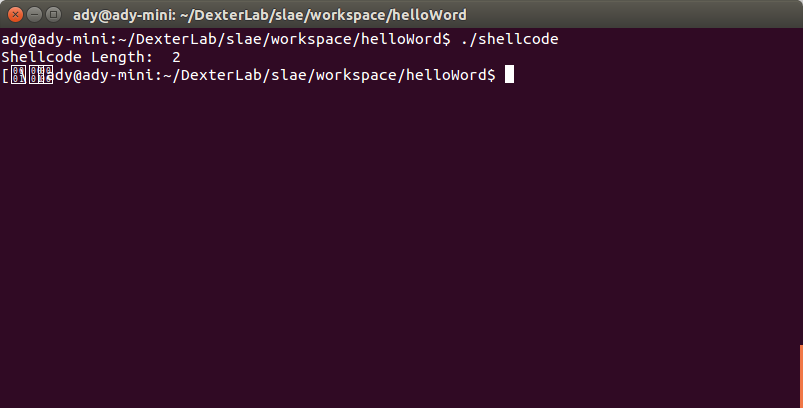
where 0x80490a0 is a (statically computed by the compiler) memory location. When the shellcode will be executed the memory location will certainly contains something else. This is the reason why when we executed our shellcode,  (see the last screenshot from the  previous ticket ) the output was some strange characters and not the expected string.

To summarize, the shellcode must dynamically compute the memory addresses of all his datas and to do this there are 2 ways: the jump call pop technique and/or push the datas on the stack.

5.1 Compute memory location using “Jump Call Pop”

In the case of the Intel call instruction, when the call is …called , the address of the next instruction is pushed to the stack (ESP register). So,  the trick  is to position the data that you want to compute the address after a call instruction and then get the address of the data from the stack. Here is some pseudocode:

funtionThatWillUseData:
    ;ESP will contain the address of the data
    pop eax
    ;now the eax will contain the address of the data 
call  funtionThatWillUseData
data: db "blabla", 0xA

Now, we will rewrite our dummy shellcode to compute the address of the “Hello World” string. Here is the new version of the dummy shellcode:

global _start
section .text       
_start:
    jmp short data

    shellcode:
        ;execute write(1,"Hello World \n", 14);
        xor eax, eax
        mov al, 0x4
        
        xor ebx, ebx
        mov bl, 0x1
        
        ;the ecx contains the address of the message variable 
        pop ecx
        
        xor edx, edx
        mov dl, 0xD
        int 0x80

        ;execute exit(0);
        xor eax, eax
        mov al, 0x1
        
        xor ebx, ebx
        mov bl, 0x5
        int 0x80
    data:
        call shellcode
        message: db "Hello World!", 0xA

At this moment we fixed the all the problems, so the shellcode should execute successfully; If you want to know how to test it, go to the “Test your shellcode” paragraph from my  previous ticket.

5.2 Compute memory location by pushing the data on the stack

The second technique (that will make your code smaller that the previous one) is to push directly on the stack the data that you want to use in your shellcode. Now if your data is longer than 4 bytes, then you can split your data in multiple chunks and push it; in our case we will split the data in 4 chunks.

Another point that is worth mentioning is that the different chunks will be pushed on the stack in the reverse order (in HEX) because the stack is growing from “up” to “down” (from upper memory addresses to lower memory addressees) and (to make the things more complex) the order on the letters in each chunk is reversed because of the Intel Little Endian architecture. So, finally the data on the stack will look like this :

Higher memory
0\n
!dlr
oW o
lleH
Lower memory

Here is the new version of our dummy shellcode:

global _start
section .text
_start:

    xor eax, eax
    mov al, 0x4
    
    xor ebx, ebx
    mov bl, 0x1
    ;push on the stack the "Hello World !\n00"
    ;"0x0"
    xor ecx, ecx
    push ecx
    ;"\n"
    push 0x0A
    ;"!dlr"
    push 0x21646C72
    ;"oW o"
    push 0x6F57086F
    ;"lleH"    
    push 0x6C6C6548
    mov ecx, esp
    
    xor edx, edx
    mov dl, 0xD
    int 0x80
    
    xor eax, eax
    mov al, 0x1
    
    xor ebx, ebx
    mov bl, 0x5
    int 0x80

Again, the shellcode should execute successfully; you can go and test it.

 6. Main points to remember

Forgetting about the technical details, these are the basic steps that you should remember for writing a shellcode in Linux:

  1. Write the shellcode in C.
  2. Rewrite the shellcode in assembler using the same system calls made by the C version of the shellcode.
  3. Fix the (eventually) addressing problem and (eventually) the null bytes problem.
  4. Test your shellcode.

All the source codes can be found on GutHub.

Bibliography

Introduction to Linux shellcode writing (Part 1)

Introduction

This is very brief and basic list of steps to follow if you want to write a shellcode under Linux operating system.

1. Craft the shellcode

The first step and by far the most important one is to find a vulnerability and to write the shellcode that’s exploiting the vulnerability. In this tutorial we will write a dummy shellcode represented by the “Hello World” program. The easiest way to write a shellcode is first to write it in the C language and then in order to have a more compact version, to translate it or to rewrite the shellcode in assembler.

1.1 Craft the shellcode in C

The main goal of writing the shellode in C is to have first working version of the exploit without (yet) bothering about the constraints of the shellcode execution (see later the chapter about the validity of the shelcode). In our case, the C version of our dummy shellcode is the following one:

#include<stdio.h>
int main(){
    write(1,"Hello World \n", 14);
    return 0;
}

After the compilation (gcc -o hello hello.c) we can take a look at the generated assembly code (objdump -d ./hello -M intel) and we would see that for a very small C program the assembly version is quite long (this is mainly due to the C preprocessor); it’s 228 lines length ( objdump -d ./hello -M intel | wc -l).

Now, we would like to “translate” the C version of our shellcode in the assembly version and the most straightforward way is by finding the system calls that hat are made by the C version of the shellcode. In some cases the system calls are quite obvious (the case of the write function) but sometimes it’s not so easy to guess. The tool that will give to you the system calls is the strace. In our case the strace ./hello will have the following output (the parts that are interesting for us are in bold):

execve("./hello", ["./hello"], [/* 62 vars */]) = 0
brk(0)                                  = 0x8826000
access("/etc/ld.so.nohwcap", F_OK)      = -1 ENOENT (No such file or directory)
mmap2(NULL, 8192, PROT_READ|PROT_WRITE, MAP_PRIVATE|MAP_ANONYMOUS, -1, 0) = 0xb76fa000
....
....
mprotect(0xb771d000, 4096, PROT_READ)   = 0
munmap(0xb76dd000, 117407)              = 0
write(1, "Hello World \n\0", 14Hello World 
)        = 14
exit_group(0)                           = ?

1.2 Craft the shellcode in assembler

Now that we have the system calls it is possible to get some infos like the parameters needed by the each system call (using man) and the system calls numbers (all the system calls names and number are in /usr/include/i386-linux-gnu/asm/unistd_32.h file).

So, the number of the write call is 4 (using cat  /usr/include/i386-linux-gnu/asm/unistd_32.h | grep write) and the parameters are the following one (using man 2 write):

ssize_t write(int fd, const void *buf, size_t count);

For the exit system call the number is 1 and the call parameter are :

void _exit(int status);

Having all the needed information, we can write the assembler version of our dummy shellcode.

In order to call system calls in assembler, you must fill the tax register with the system call number and fill the register ebx, ecx, edx for every parameter that the system call need.

For example the write have 3 parameters so the tax register will be filled with 0x4 (the system call number), ebx register will contain the file descriptor (1 for sysout), ecx register will contains the address of the string to print, and edx register will contain the length of the string to print (if you don’t have any knowledge of linux assembler you can take a look to this very good introduction Assembly Language and Shellcoding on Linux ):

global _start
section .text
_start:
    ;execute write(1,"Hello World \n", 14);
    mov eax, 0x4
    mov ebx, 0x1
    mov ecx, message
    mov edx, 0xD
    int 0x80

    ;execute _exit(0);
    mov eax, 0x1
    mov ebx, 0x5
    int 0x80
section .data
    message: db "Hello World!", 0xA

Now, we can create an executable (using nasm and ld) using the following commands:

nasm -f elf32 -o hello.o hello.asm
ld -o hello hello.o

2. Test your shellcode

In order to test your shellcode you can use the following C program (which is a slightly modified version of the code from the (famous) “Smashing the stack for fun and profit“):

#include<stdio.h>
#include<string.h>
unsigned char shellcode[] = \
"replace this with the hex version of the shellcode";
main()
{
    printf("Shellcode Length:  %d\n", strlen(shelcode));
    int (*ret)() = (int(*)())shellcode;
    ret();
}

The above lines are simulating a vulnerable program by overwriting the return address of the main() function with the address of the shellcode, in order to execute the shellcode instructions upon exit from main().

The HEX version of the shellcode can be obtained from the binary file using the objdump utility and a much smarter version of the command can be found on commandlinefu.com

Lets compute the HEX version of our dummy shellcode and then test it with our  test program.

The HEX version of our assembler version of the dummy shellcode is the following one:

"\xb8\x04\x00\x00\x00\xbb\x01\x00\x00\x00\xb9\xa4\x90\x04\x08
\xba\x0d\x00\x00\x00\xcd\x80\xb8\x01\x00\x00\x00\xbb\x05\x00\x00\x00\xcd\x80"

We add the new shelcode to the test program and then compile the test program:

gcc  -z execstack shellcode.c -o shellcode

We execute the shelcode program and we have the following output:

Screenshot from 2015-08-19 23-33-15

As you can see the execution didn’t went very well for a number of reasons that will be explained in the second part of this small tutorial.

Book review: Hacking – the art of exploitation, 2-end edition

This is a review of the Hacking – the art of exploitation, 2-end edition book.hck2ed

Chapter 0x100 Introduction

Very short chapter (2 pages and 1/2) in which the author gives his definition of a hacker; person that find unusual solutions to any kind of problems, not only technical problems. The author also expresses very clearly the goal of his book: “The intent of this book is to teach you the true spirit of hacking. We will look at various hacking techniques, from the past to the present, dissecting them to learn how and why they work”.

Chapter 0x200 Programming

The chapter is an introduction to C programming language and to assembler for Intel 8086 processors. The entry level is very low, it starts by explaining the use of pseudo-code and then very gradually introduces many of the structures of the C language: variables, variables scopes, control structures, structs, functions, pointers (don’t expect to have a complete introduction to C or to find advanced material).

The chapter contains a lot of code examples very clearly explained using the GDB debugger. Since all the examples are running under Linux, the last part of the chapter contains some basics about the programming on Linux operating system like file permissions, uid, guid, setuid.

Chapter 0x300 Exploitation

This chapter it builds on the knowledge learned in the previous one and it’s dedicated to the buffer overflow exploits. The most part of the chapter treats the stack-based buffer overflow in great detail using gradual complexity examples. Overflow vulnerabilities on other memory segments are also presented, overflows on the heap and on the BSS.

The last part of the chapter is about format string exploits. Some of the string vulnerabilities use specific GNU C compiler structures (.dtors and .ctors). In almost all the examples, the author uses the GDB to explain the details of the vulnerabilities and of the exploits.

One negative remark is that in some of the exploits the author use shell codes without explaining how these shell codes have been crafted (on the other side an entire chapter is devoted to shell codes).

Chapter 0x400 Networking

This chapter is dedicated to the network hacking(s) and can be split in 3 parts. The first part is rather theoretical, the ISO OSI model is presented and some of the layers (data-link layer, network layer and transport layer) are explained in more depth.

The second part of the chapter is more practical; different network protocols are presented like ARP, ICMP, IP, TCP; the author explains the structure of the packets/datagrams for the protocols and the communication workflow between the hosts. On the programming side, the author makes a very good introduction to sockets in the C language.

The third part of the chapter is devoted to the hacks and is build on the top of the first two parts. For the  package sniffing hacks the author introduces the libpcap library and for the package injection hacks the author uses the libnet library (ARP cache poisoning, SYN flooding, TCP RST hijacking). Other networking hacks are presented like different port scanning techniques, denial of service and the exploitation of a buffer overflow over the network.  In most of the hacks the authors it’s crafting his own tools but sometimes he uses tools like nemesis and nmap.

Chapter 0x500 Shellcode

This chapter is an introduction to the shellcode writing. In order to be injected in the target program the shelcode must be as compact as possible so the best suitable programing language for this task is the assembler language.

The chapter starts with an introduction to the assembler language for the Linux platform and continues with an example of a “hello word” shellcode. The goal of the “hello word” shellcode is to present different techniques to make the shellcode memory position-independent.

The rest of the chapter is dedicated to the shell-spawning(local) and port-binding (remote) shellcodes. In both cases the same presentation pattern is followed: the author starts with an example of the shellcode in C and then he translates and adapts (using GDB)  the shellcode in assembler language.

Chapter 0x600 Countermeasures

The chapter is about the countermeasures that an intruder should apply in order to cover his tracks and became as undetectable as possible but also the countermeasures that a victim should apply in order reduce or nullify the effect of an attack.

The chapter is organized around the exploits of a very simple web server. The exploits proposed are increasingly complex and stealthier; from the “classical” port-biding shellcode that can be easily detected to more advanced camouflage techniques like forking the shellcode in order to keep the target program running, spoofing the logged IP address of the attacker or reusing an already open socket for the shellcode communication.

In the last part of the chapter some defensive countermeasures are presented like non-executable stack and randomized stack space. For each of this hardening countermeasures some partial workarounds are explained.

Chapter 0x700 Cryptology

The last chapter treats the cryptology, an subject very hard to explain to a neophyte. The first part of the chapter contains information about the algorithmic complexity, the symmetric and asymmetric encryption algorithms; the author brilliantly demystifies the operation of the RSA algorithm.

On the hacking side the author presents some attacks linked to the cryptography like the man-in-the-middle attack of an SSL connection (using the mitm-ssh tool  and THC Fuzzy Fingerprint) and cracking of passwords generated by Linux crypt function (using dictionary attacks, brute-force attacks and rainbow tables attacks).

The last part of the chapter is quite outdated in present day (the book was edited in 2008) and is dedicated to the wireless 802.11 b encryption and to the weaknesses of the WEP.

Chapter 0x800 Conclusion

As for the introduction chapter, this chapter is very short and as in the first chapter the authors repeats that the hacking it’s state of mind and the hackers are people with innovative spirits.

(My) Conclusion

The book it’s a very good introduction to different technical topics of IT security. Even if the author tried to make the text easy for non-technical peoples (the chapter about programming starts with an explanation about pseudo-codes) some programming experience is required (ideally C/C++) in order to get the best of this book.

How to mount VMware shared folders on Ubuntu 11

Environment: VMware Fusion 3.1.3 on MacOsX Leopard. Virtual system: Ubuntu 11.10

Goal: Mount the (MacOsX)folder /Users/ady/Downloads as a shared folder on the Ubuntu system.

Step 1: In the VMware Fusion turn on the sharing for the Ubuntu system:

Step2: On Ubuntu install the VMware tools (see this for more details)

#install kernel headers so modules will work
#needed this on a 10.04 guest running in a Fusion 3 host
sudo apt-get install linux-headers-virtual

# install kernel modules
sudo apt-get install --no-install-recommends open-vm-dkms# OR: a headless install
sudo apt-get install --no-install-recommends open-vm-tools

Step3: Create a Dowmloads folder in the /mnt directory

cd /mnm
sudo mkdir Downloads

Step4: Update the fstab file
Add at the end of the file the following line:

.host:/Downloads /mnt/Downloads vmhgfs defaults,ttl=5,uid=1000,gid=1000 0 0

Step5: Restart the Ubuntu system.